3D Printing LIDAR Survey Topography (GeoTIFF to hollowed resin print)

Primary Goals
- Obtain a physical print of publicly-available LiDAR survey data, suitable for educational and decorative use.
- Evaluate suitability of common open-source mesh manipulation and 3D printer slicer software for larger datasets (millions of mesh vertices).
Secondary Goals
- Demonstrate an up-to-date and libre workflow for generating mesh data from commonly-available GeoTIFF data, as existing methods documented on the web use proprietary tools and/or tools difficult to run on modern systems.
- Demonstrate an inexpensive and visually pleasing way to paint the resulting physical print.
Prerequisites
- Topographical survey data containing your region of interest, in GeoTIFF format. We will explore options below.
- A working Python 3.X (or later, assuming later Python versions maintain source compatibility with 3.X). Setup guide.
- The GIT source control program (technically optional). Downloads
- A computer with a lot of RAM. Processing the data into a mesh has relatively low requirements (single-digit gigabytes). However, subsequent preparation for 3d-printing (as shown below) will consume a lot of RAM (tens of gigabytes). If your region of interest is small or survey resolution is low, you may get away with less, especially if you simplify the mesh beforehand (as mentioned later in this page). My advice would be to close all extra programs (web browsers, in particular) and just give it a shot with what you have.
- A couple gigabytes of free disk space. An SSD will make this a lot faster.
- The ability to extract TAR archives (Linux and OSX have built in tools, Windows users can use something like 7Zip).
- A copy of Meshlab (to simplify the mesh).
- A copy of MeshMixer to extrude the flat terrain surface into a volumetric shape (could perhaps use something else).
- A copy of PrusaSlicer (to hollow and support). This is optional if you have an existing STL printing workflow you like.
Selecting and obtaining survey data
Our objective here is to obtain a GeoTIFF representation of topographical survey data.
Finding topographical data
Start with OpenTopography, which is an invaluable collection of topographical data from across the world. Your first step is to find the most appropriate (typically: highest resolution) scan available for your region of interest. This may be done via their map-based query tool. Make sure the survey you select completely encompasses your region of interest. We will discard data outside your region of interest when we download the data. Consider signing up for a free account at OpenTopography, as this will let you check on your export jobs easily. Once you find a suitable dataset, visit its detail page by clicking its name in the map popup that shows when you click on a survey. For this example, we can use a scan of the Flatirons area in Colorado, USA: https://portal.opentopography.org/datasetMetadata?otCollectionID=OT.032012.26913.1. Please always abide by the license listed on the dataset. For this example, the license is CC BY 4.0, but this is different per dataset.
Downloading topographical data
You should be on a dataset info page that looks a little like this:
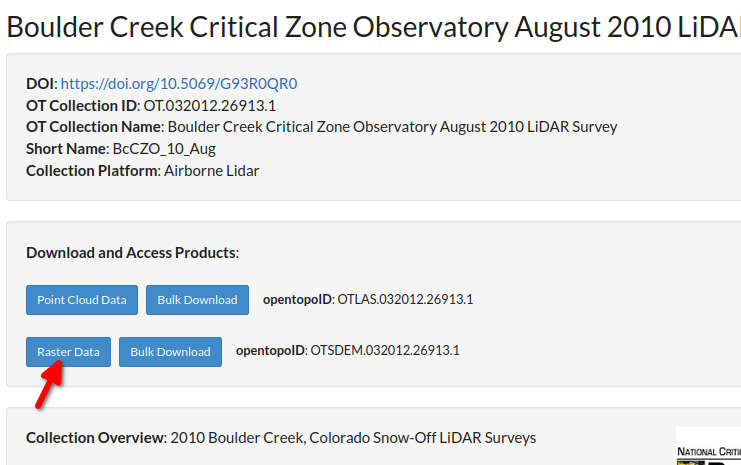
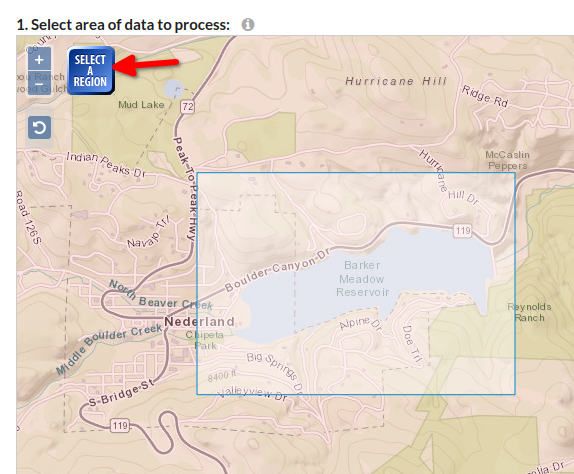
If you need an example page, you can use this scan. Click the "Raster Data" button as indicated by the red arrow in my screenshot. You will be dropped onto a fairly complex page, but we are almost done. Select GeoTiff as the Data Output Format, and make sure Digital Terrain Model (DTM) is selected. If you want to include trees and buildings, you will want Digital Surface Model (DSM). You can read about the difference here. Next, use the Select A Region button in the map (denoted by a red arrow in my screenshot) to select your region of interest (click and drag on the map after clicking the button):
Enter a meaningful-to-you job title and description at the bottom, double check your email, and leave everything else as default. Click Submit.
After a while, you should receive an email like this:
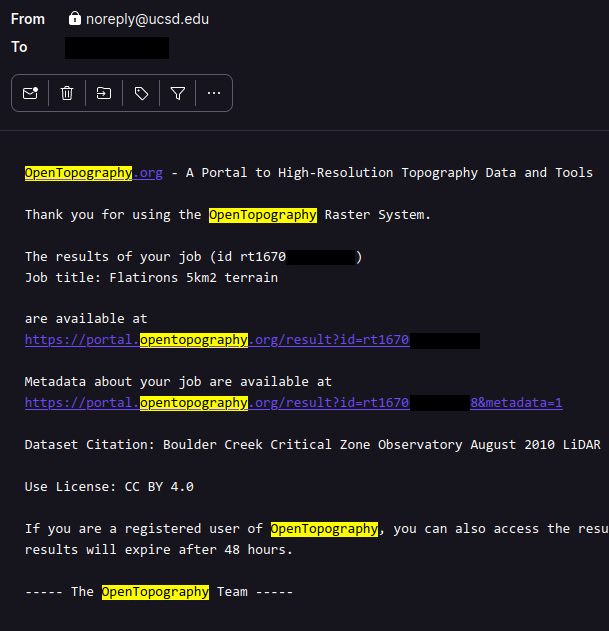
Go ahead and follow the link, then click on "Download compressed raster results".
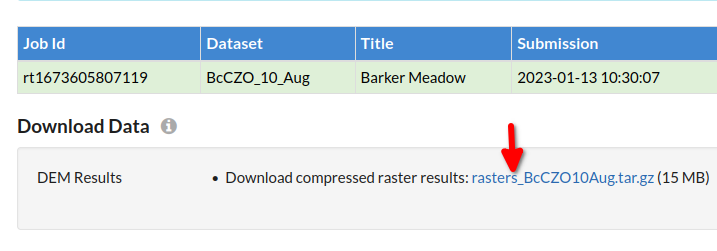
Extract the single TIFF file in the downloaded archive and put it somewhere convenient.
Processing GeoTIFF into an STL
For this we will use a project call phstl to process the GEOTIFF into an STL surface, and then Meshmixer to make it into a printable solid.
Make sure python 3.X and git are installed (see above links). Then, the steps are:
pip3 install gdal # install the GDAL library, needed for phstl
git clone https://github.com/petebachant/phstl.git # Get phstl
cd phstl
git checkout py3 # Switch to a branch that supports modern Python
Make a note of the full path to the .tif file you extracted earlier (in this example we will use /home/user/output_hh.tif) and invoke phstl:
python3 phstl.py /home/user/output_hh.tif /home/user/my_surface_terrain.stl
This will generate a file called /home/user/my_surface_terrain.stl but this is not printable yet. For this we will need to follow phstl's own tutorial using Meshmixer to extrude the surface into a flat-bottom surface. Make sure you follow the steps under "Extrude a Surface with a Flat Base". Once you have completed that, return to this document.
Reducing the mesh to a more reasonable size
It is likely your mesh will be hundreds of megabytes to gigabytes in size. This may exceed your computer's available RAM, so you might want to reduce the model's triangle count. You can use MeshLab for this (tutorial) or any other software you like. Make sure to re-export the model as STL when you're done. I personally skipped this step and let my computer work through the model for a few hours.
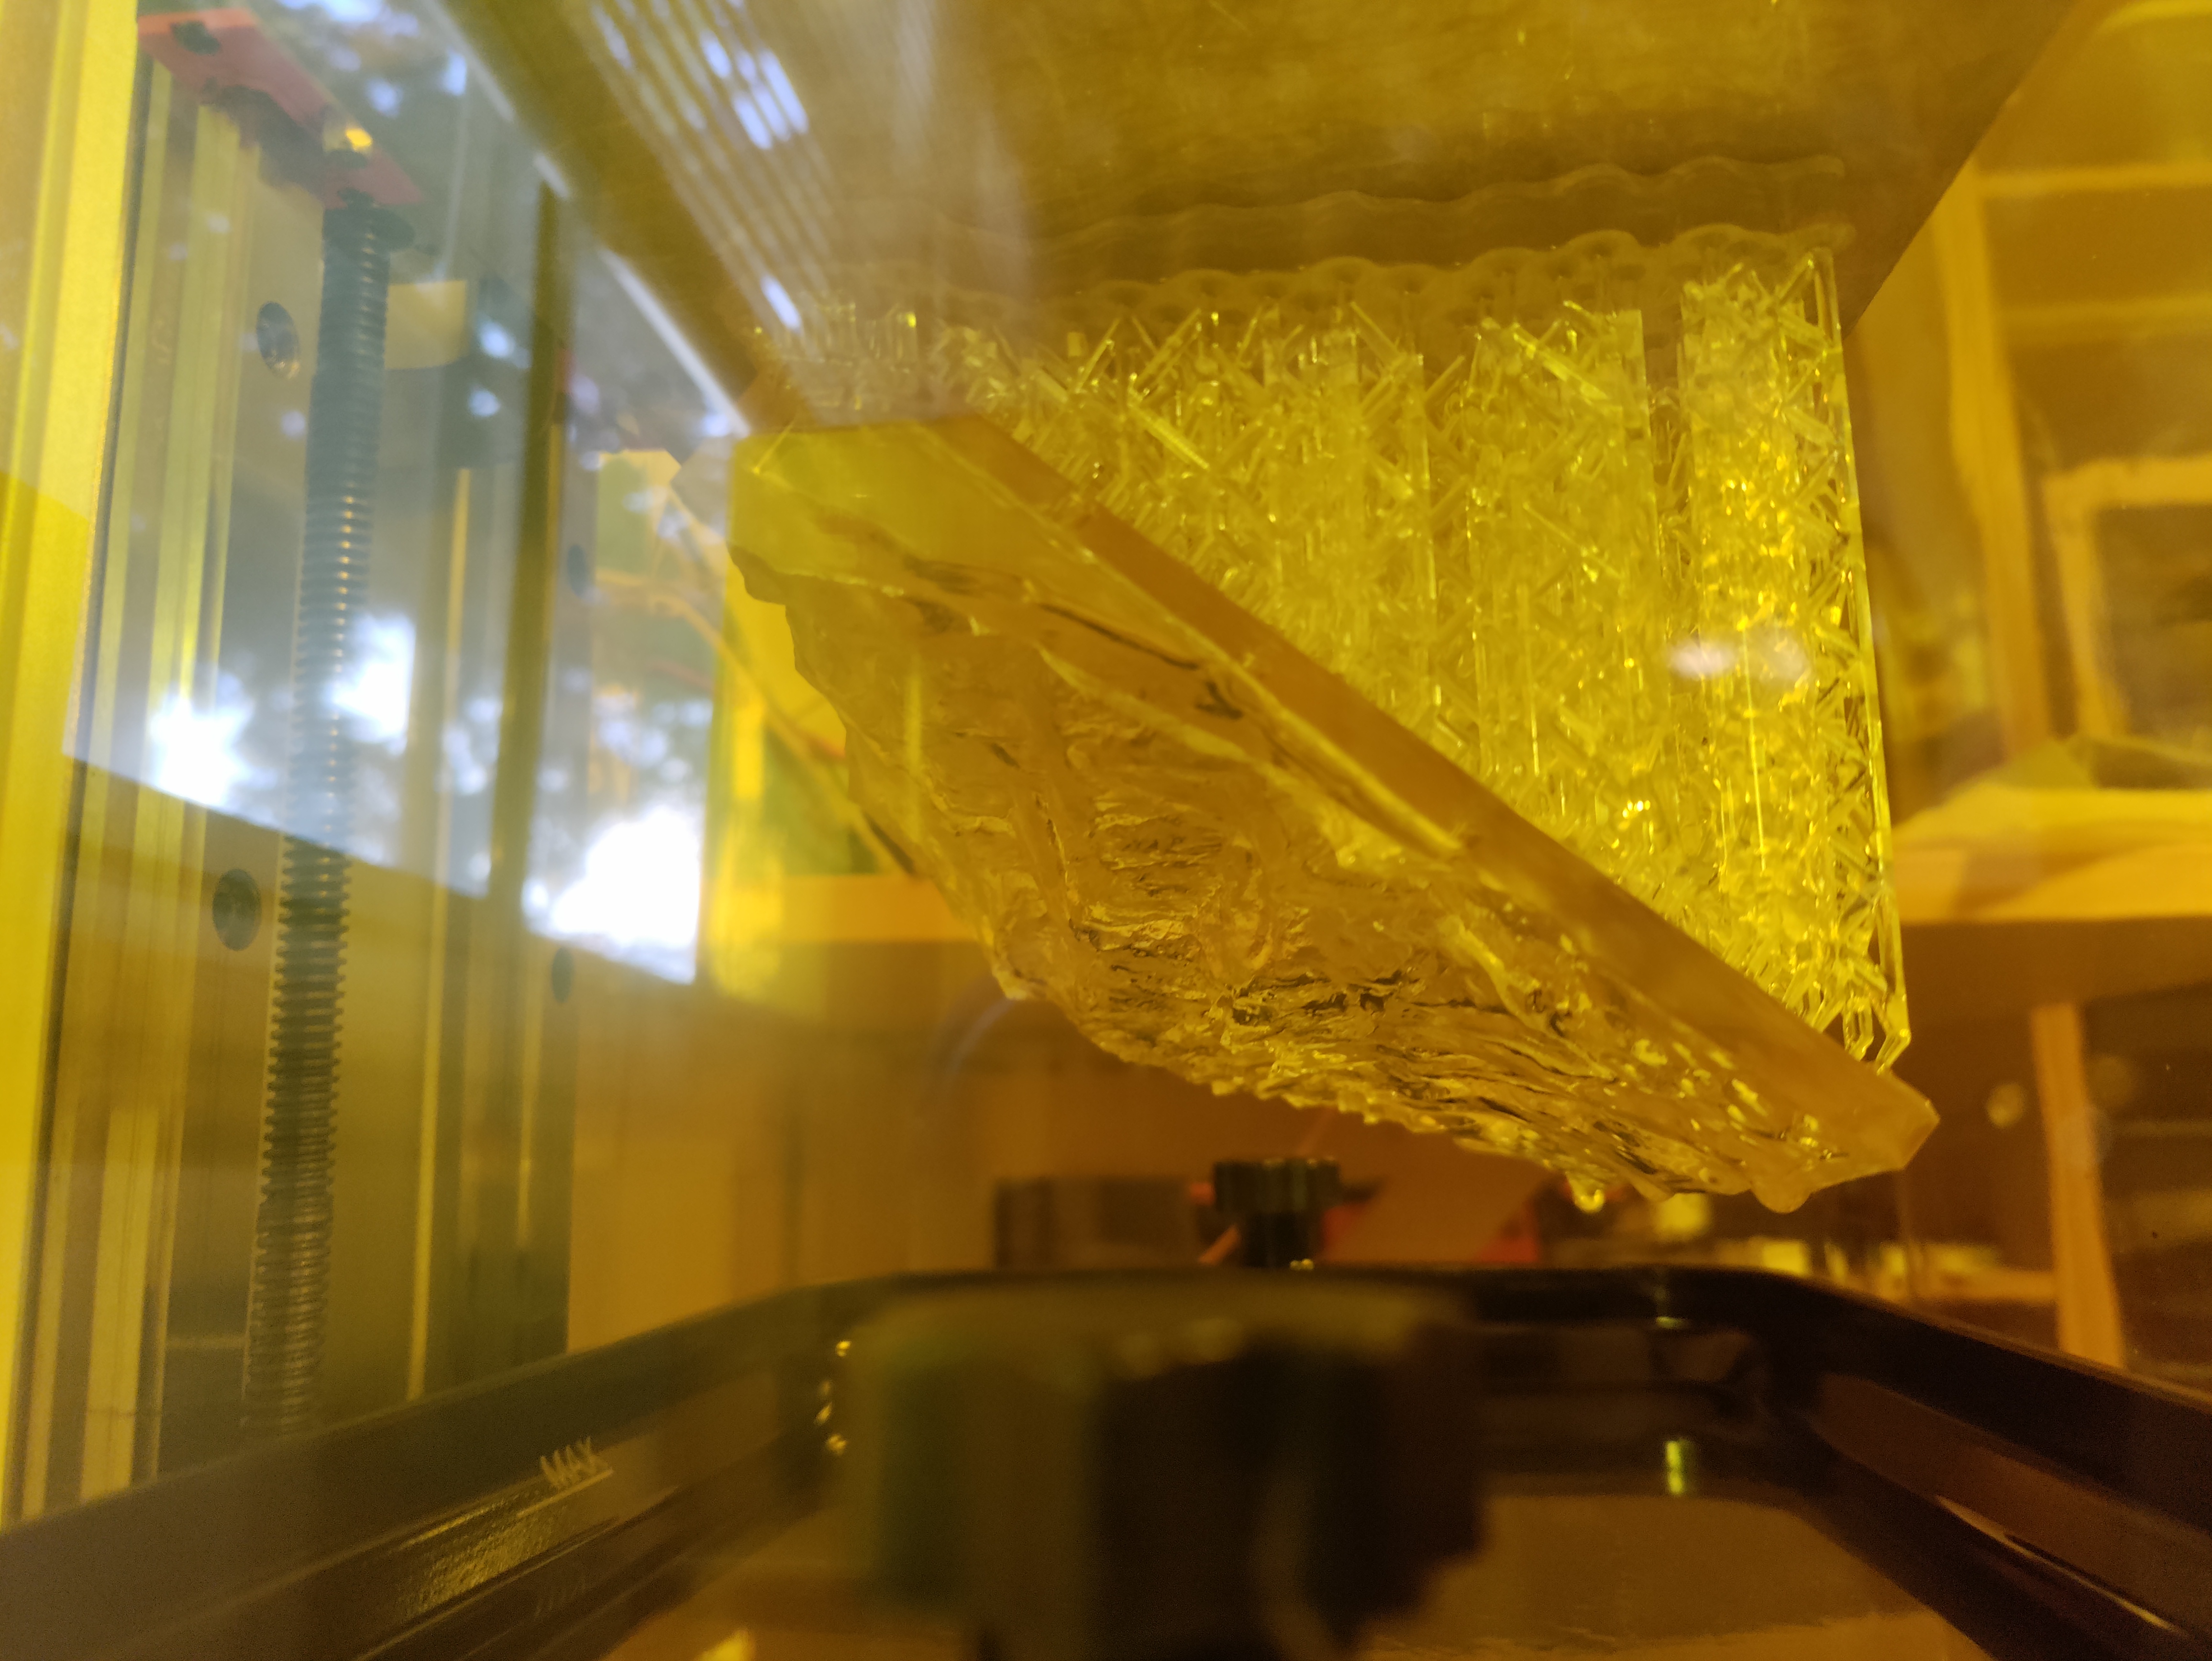
Supporting and hollowing the model
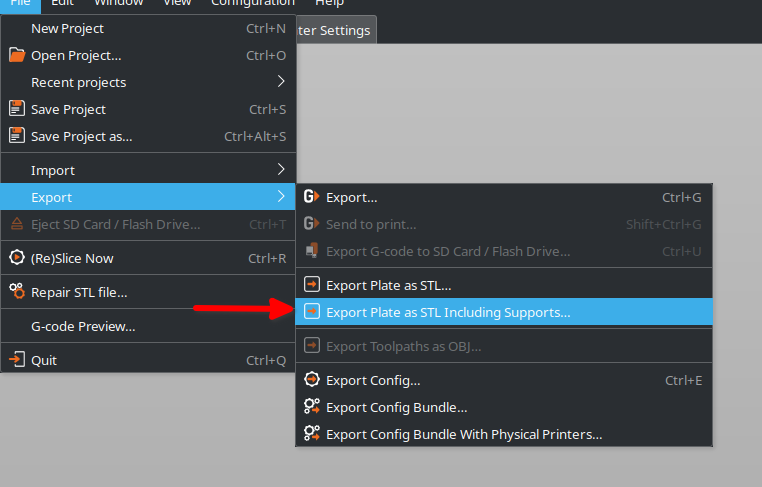
At this point we go into general 3d-printing territory which is beyond the scope of this article. My personal resin printing workflow is to use PrusaSlicer to hollow and support the extruded STL. You can find a guide here. Once supported and hollowed, I export the model with File -> Export -> Export Plate as STL Including Supports and then slice and print with Photon Studio.
Of course, use any slicer suitable for your machine. Hollowing and supporting is not necessary for regular FDM (filament) printers, as slicers will do this automatically.
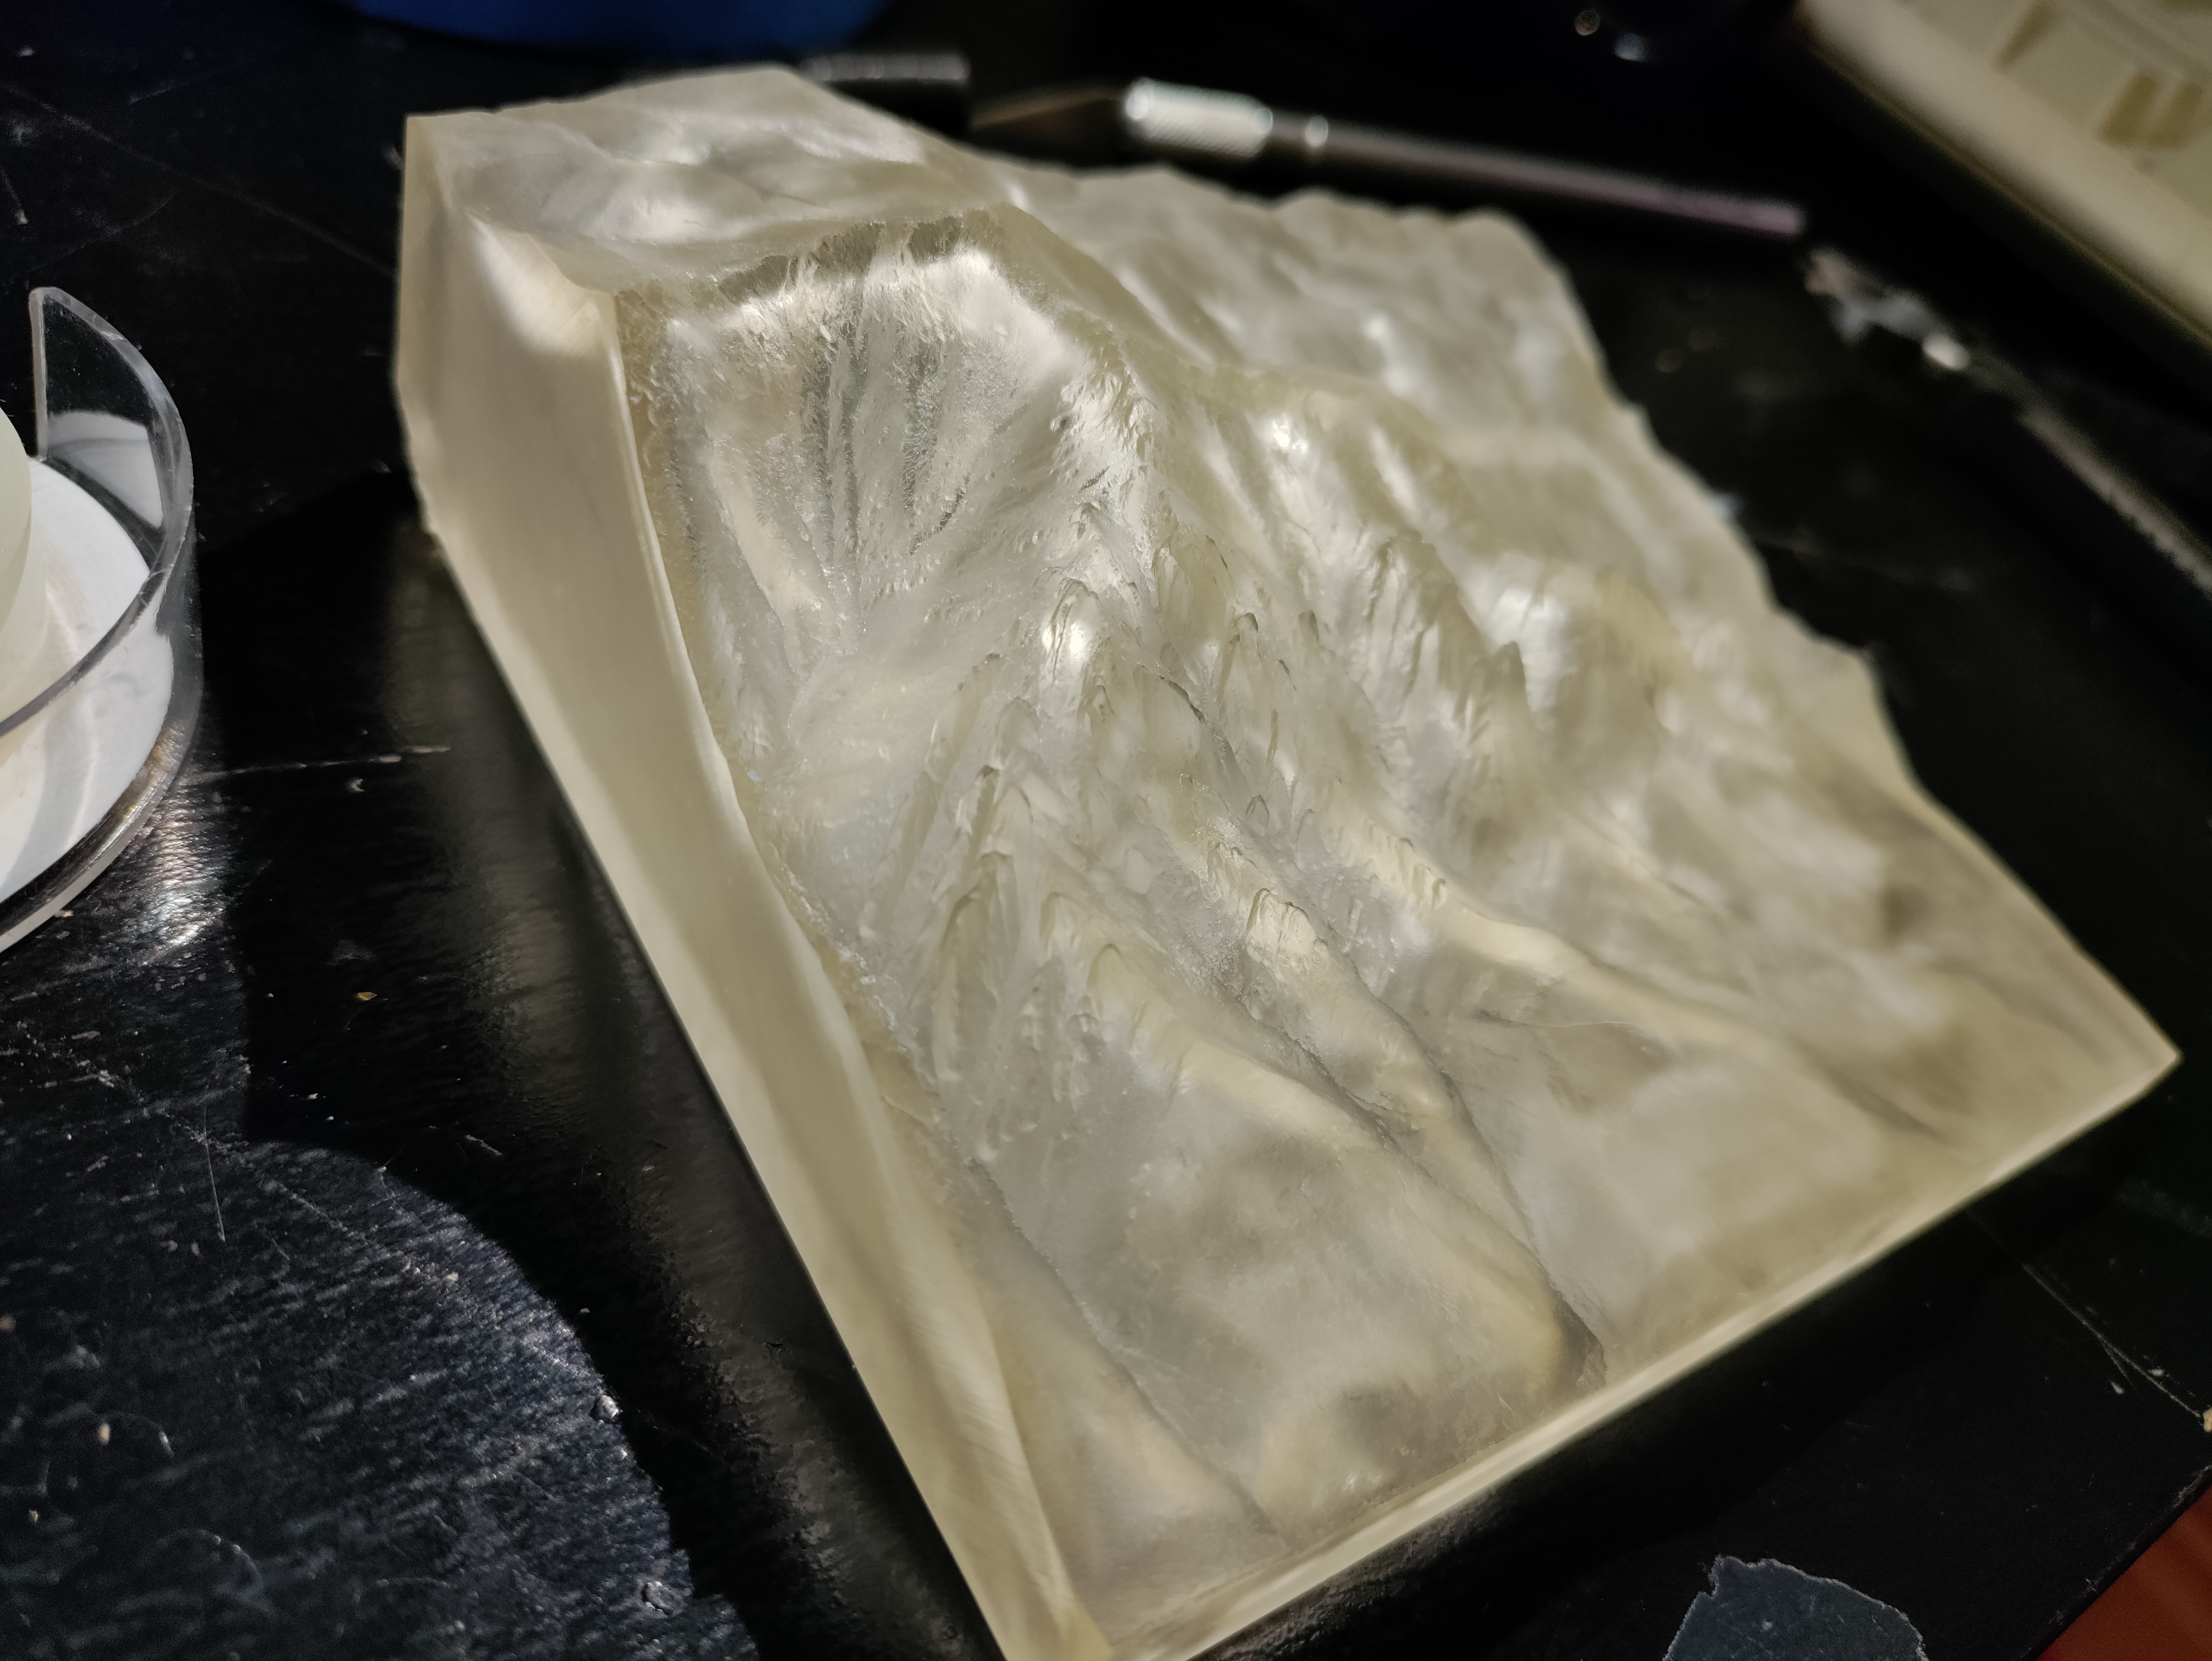
Printing and painting
Load the final STL into your slicer and print it out. You can get a surprisingly good result even with 0.1mm layer hight, but go with a setting most appropriate to your machine. I used 0.02mm for my Anycubic Photon Mono X.
For painting the model (optional, though it's probably good to at least paint it a solid tan color for visibility), my process was:
- Make sure the model is fully cured and well washed.
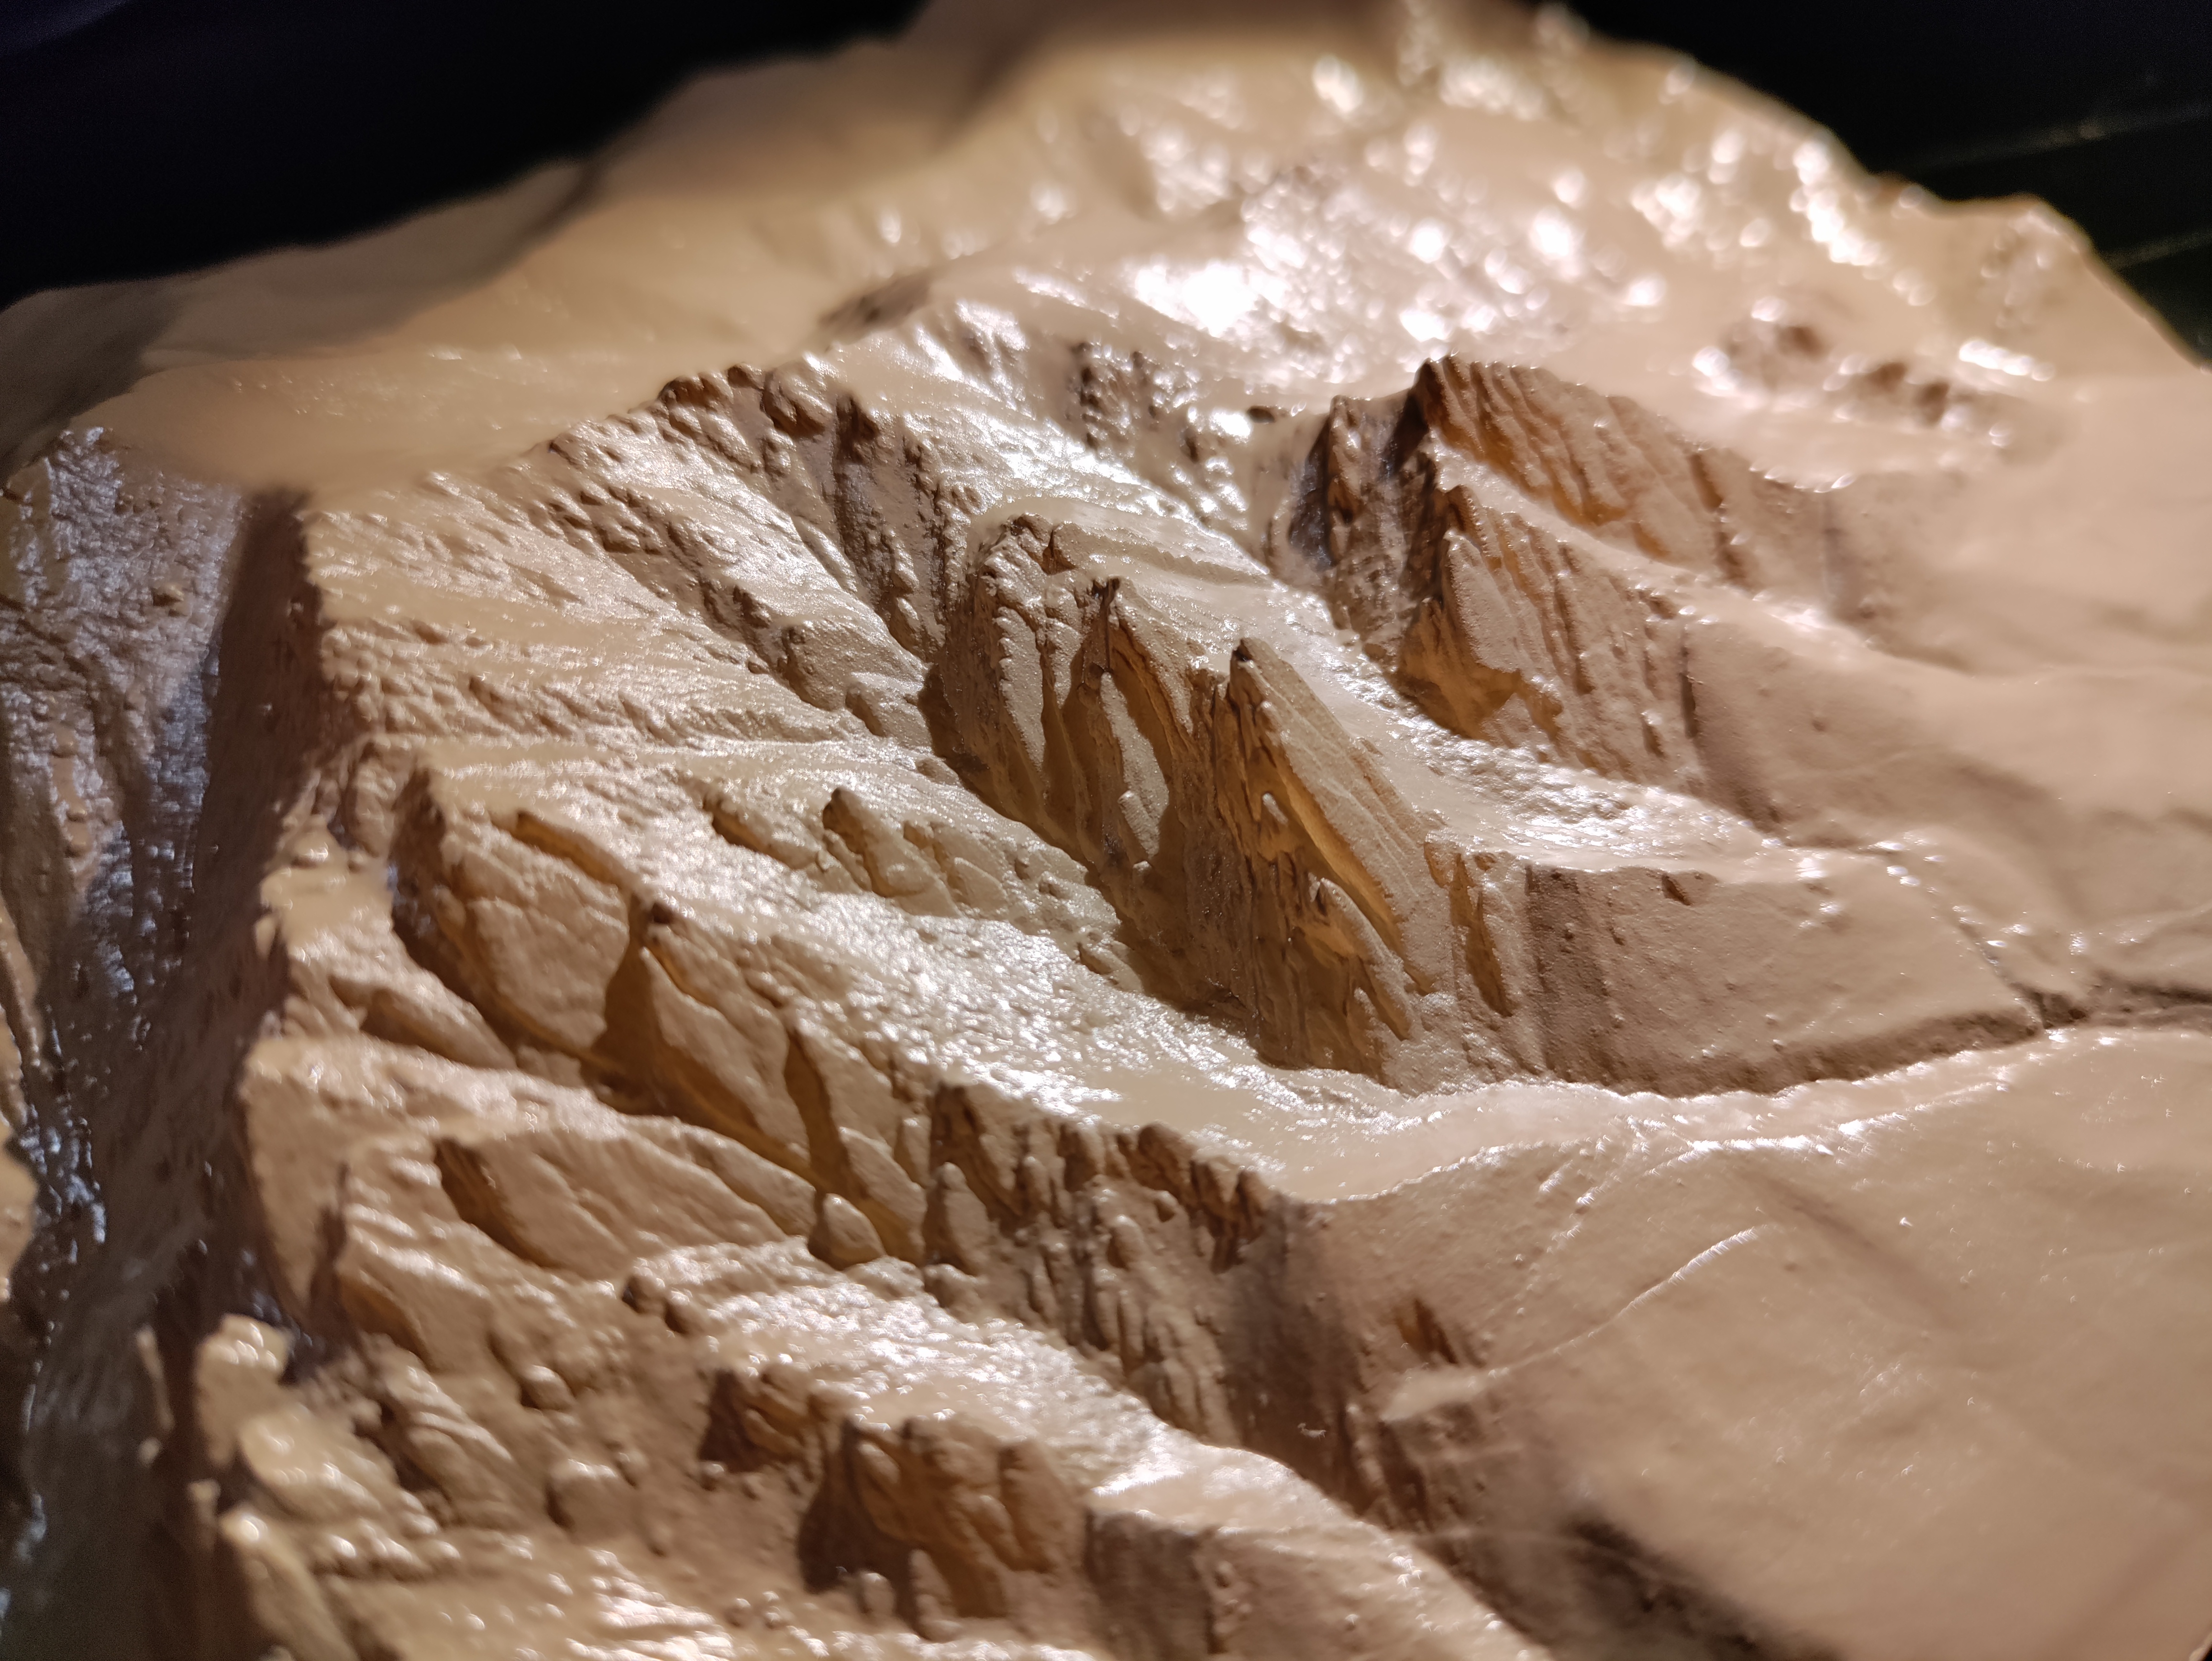
- Apply 1 coat of a spray primer suitable for platic. I used a Krylon product from the local hardware store.
- Apply 2 coats of a flat tan spray paint. I used Krylon's flat camo tan. The important thing is to use a flat paint, not glossy. Otherwise the hand paint will not stick as well.
- Obtain reference pictures of the terrain for artistic reference. I used instagram.
- Obtain a selection of artist's acrylic paints. I used cheap ones from the supermarket. I grabbed a couple shades of green (a grassy green, a dark green, and a middle green), a rock tan color, and black, based on the reference pictures.
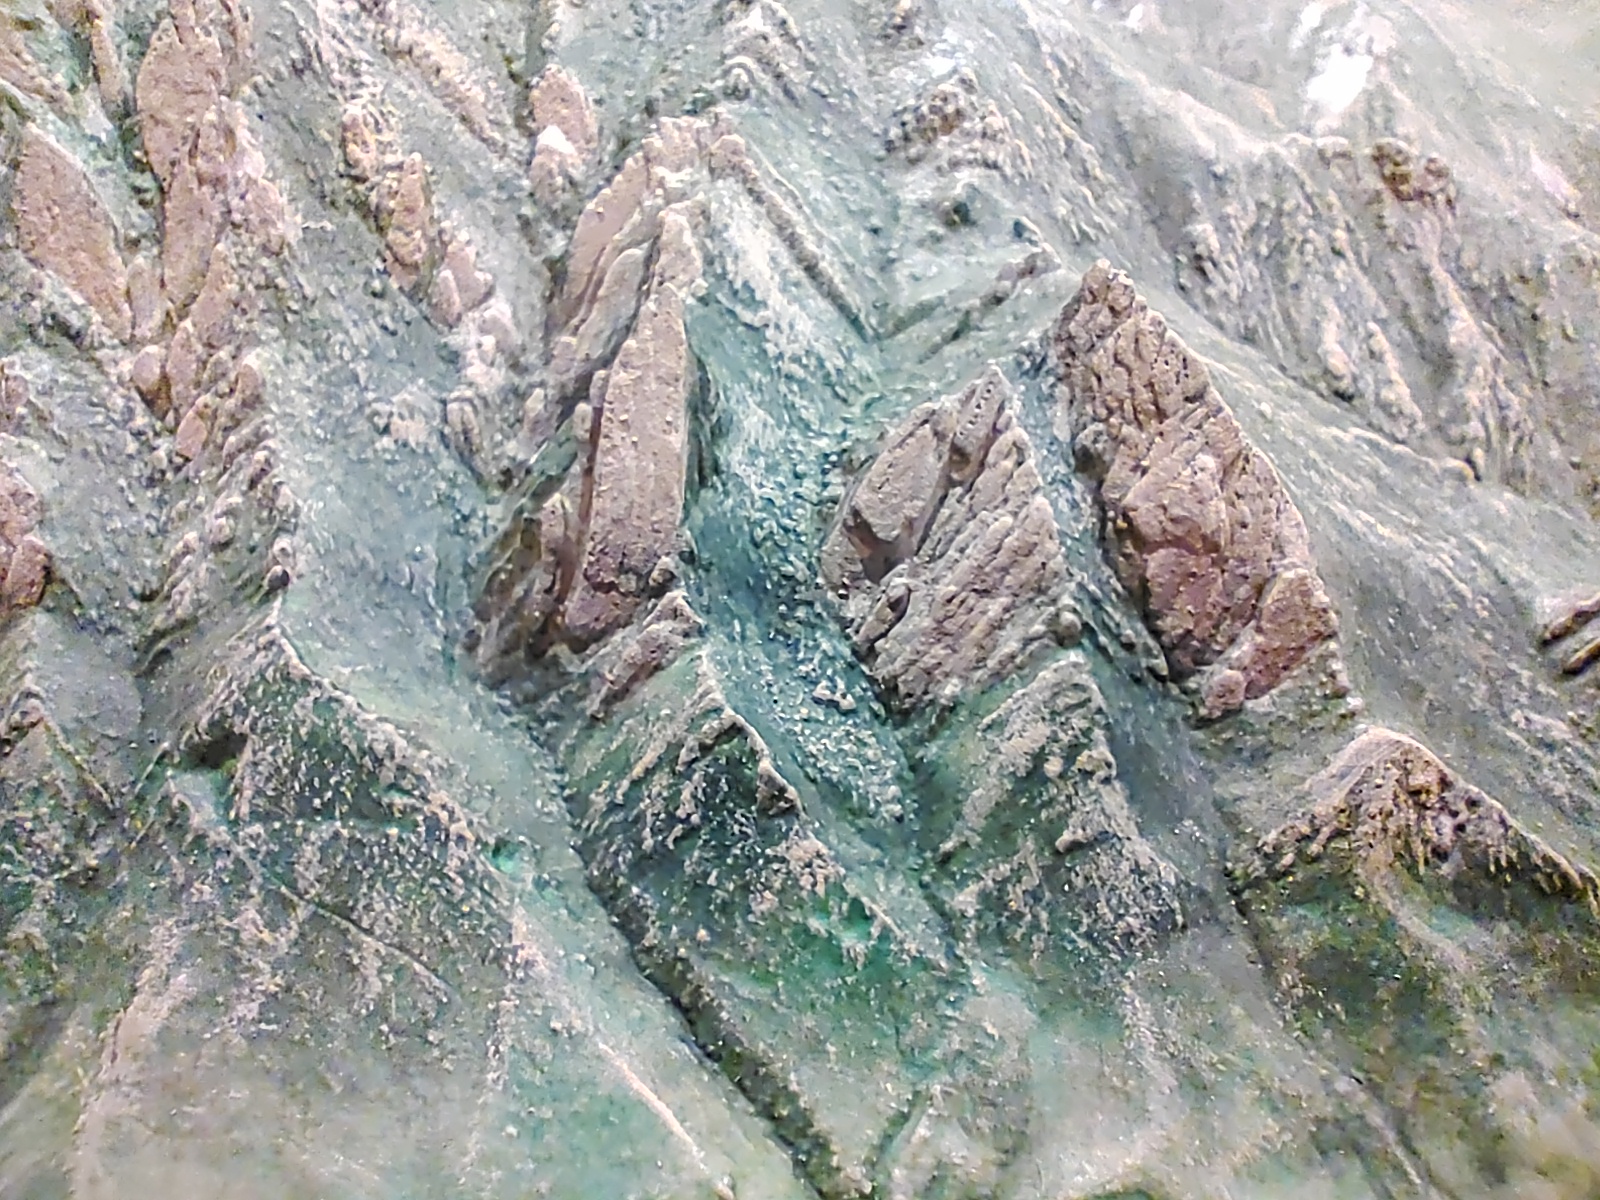
- Using a wide brush, apply a couple coats of the light grassy green to the entire model.
- Apply progressively darker shades of color, working higher and higher in altitude. Between coats, use your finger to work the paint into an acceptable shape. It is much better to apply a tiny, tiny amount of paint at a time instead of trying to cover large areas. I would often just put a single light brush stroke in an area and spend a few seconds working it with a finger and a clean brush. This will take time.
Apply the tan color to peaks in a drybrush technique, as per this video:
- Wait a half an hour for things to dry.
- Prepare a thin wash of black paint by mixing black acrylic paint with a bit of water. You want the paint to be runny, but not thin enough to bead up.
- Aggressively apply the thin wash to an area of the model. You will see it run deep into valleys and other features. Within a couple seconds, try to gently clean as much of it off as possible using a soft cloth (not a paper towel, ideally, to avoid damage). This will greatly add depth to your model.
- You may want to go back in and dry-brush a bit more after the dark wash. Only do this after everything is dry.
- Give the model a day to dry.
- Apply a couple coats of a matte clear coat, such as the Krylon product available in most hardware stores.
It is OK if your first attempts don't look right. You may need to try the paint several times. Watch plenty of videos on YouTube about various model making techniques (keywords: drybrush, model washes, miniature painting) and you'll get it with time! It is OK to start over, just put a new coat of primer and tan base coat if things get too messed up.
If you'd like to hire me to make a finished model for you, please contact me at the email on the homepage!
Thanks for reading, and enjoy!